Expressjs is well known framework for build javascript applications and APIs. I often use express to build Proof of concept apps ( heh I build this little one just last week https://www.apprunnerdemo.com ).
One of the questions I get asked a lot is how should I begin building small apps in a Serverless manner without getting to confused as I start the journey. Many developers are building traditional applications on node.js and hosting on EC2, or containers ( or have heard about it ) and want another option. In this post we will explore how to build a Node.js Express application that runs locally ( for easy of development ) but can also be deployed easily with SAM ( Serverless Application Model ). The requirements for this example are:
- Node.js installed ( at least version 10 )
- An AWS Account and local credentials setup and configured ( see here )
- AWS Sam installed
Alternatively you can use AWS Cloud9 for the whole task as it is already pre-configured.
I have a bootstrap repository here: https://github.com/DevsInTheShed/aws-sam-nodejs-express
Begin by cloning this repository:
git clone https://github.com/DevsInTheShed/aws-sam-nodejs-expresscd into the folder, then again to the core of the application
cd aws-sam-nodejs-express
cd app
Then run:
npm installThis will install required dependancies. The app is now ready to run locally. We will run the app and see it in action before looking at the code.
npm run dev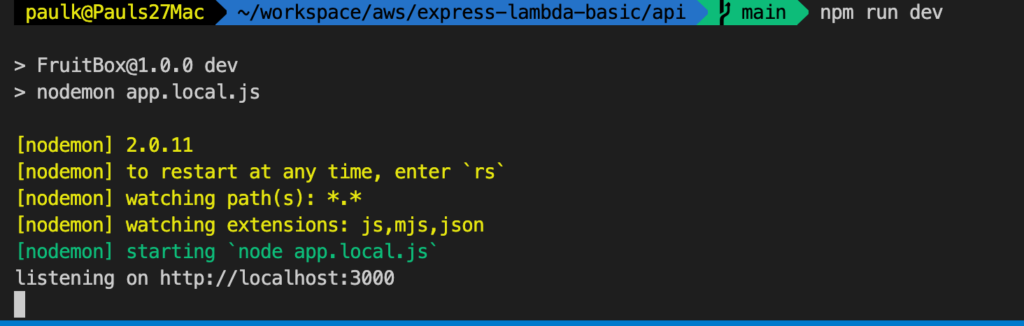
The application is now up and running on port 3000.
Open a browser and navigate to: http://127.0.0.01:3000
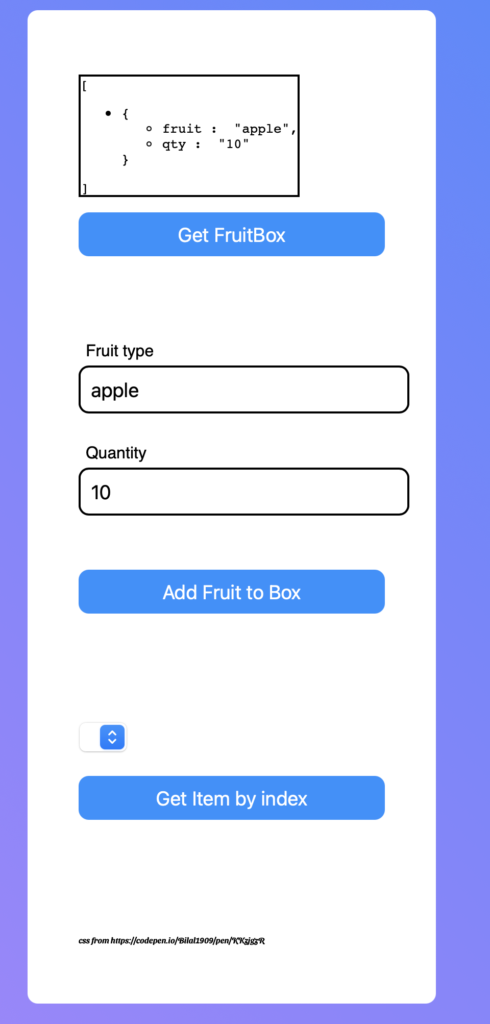
This is a simple application that has a basic html page with some fetch calls to the api. The application is the creation of a box of fruit, you can add fruits to the box, you can list all the fruit in the box and you can get the fruit by index. Explore the UI. ( note you have to refresh the page to update the combo box )
Lets look at the code
Open up api/app.js
const express = require('express')
const app = express()
const router = express.Router()
const bodyParser = require('body-parser')
const cors = require('cors')
const path = require('path')

let FruitBox = [];

//Static content ie images
app.use('/static', express.static('static'))

router.use(cors())
router.use(bodyParser.json())
router.use(bodyParser.urlencoded({ extended: true }))

app.set('view engine', 'ejs');
app.set('views', path.join(__dirname, 'views'));

router.get('/', function(req, res) {
    res.render('index', { fruitBox: FruitBox })
})

router.get("/fruitbox", async (req, res) => {
    res.send(JSON.stringify(FruitBox))
});

router.get("/fruitbox/:item", async (req, res) => {
    const item = parseInt(req.params.item)
    res.send(JSON.stringify(FruitBox[item]))
});

router.post('/fruitbox', async (req, res) => {
    let result
    try{
        const fruitName = req.body.fruitName;
        const qty = req.body.qty;
        const item = { fruit: fruitName, qty : qty}
        FruitBox.push(item)
        result = FruitBox
        res.status(200)
    }catch(e){
        console.log(e)
        result = { errorMessage : 'Ensure your POST body conatains both a fruitName and a qty and content type is application/json '}
        res.status(500);
    }

    res.send(result)

})

app.use('/', router)

module.exports = app;
If you have worked with express you will see nothing new here, there is a path to render the front page ( UI ), and then 3 routes:
- /fruitbox ( get )
- /fruitbox/:index ( get )
- /fruitbox ( post )
These are the core of the api, the 2 get methods you can experiment with in the browser simple by browsing to:
http://localhost:3000/fruitbox and http://localhost:3000/fruitbox/{index} ( where index is a number 0-amount of fruit -1 )
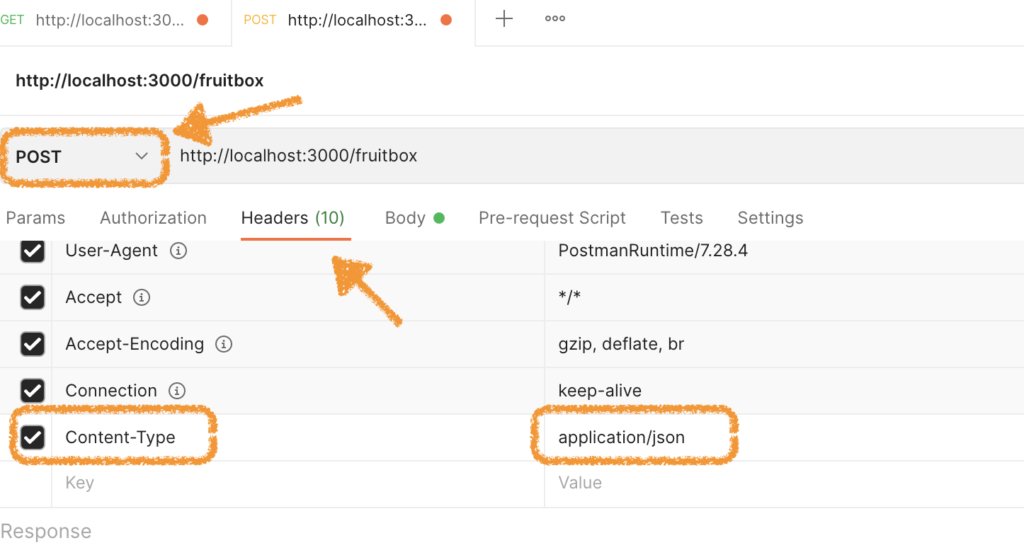
Let’s quickly explore the post method, this is how we would add an item.
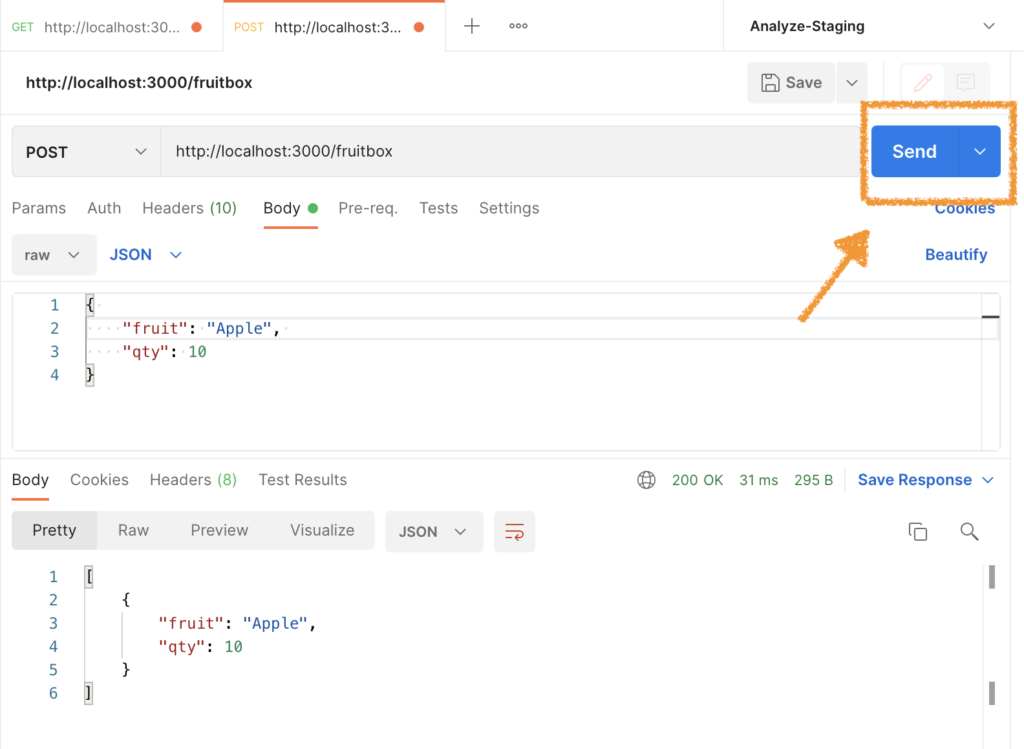
I have used postman for this, post man is available fully in the browser or as a downloadable application from: https://www.postman.com/downloads
Open Postman, set the URL to http://127.0.0.1:3000/fruitbox set the method to “POST”, Click on “headers” and add:
- Content-Type application/json
Click on “Body” Set the type to “raw” and add the following:
{
    "fruit": "Apple",
    "qty": 10
}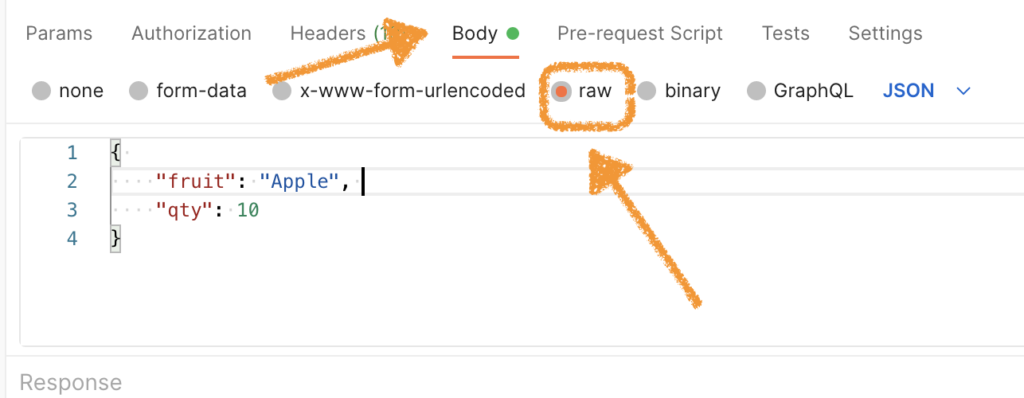
Then click “Send”
Success you have built your first API with express. There is no database for this demo, just a variable ( array ) that we add too to mimic a database.
Let have a quick look at how this is run locally. Open /api/package.json and look for:
"scripts": {
    "dev": "nodemon app.local.js"
 }
This line tells us what happens when we run the npm run dev command. Nodemon is use for hot reloading, you would notice if you altered the code and saved the file the application will restart automatically ( very handy for development ).
Next lets open /api/app.local.js
const app = require('./app')
const port = 3000
app.listen(port)
console.log(`listening on http://localhost:${port}`)
These 4 lines are very powerful and you’ll see why once we introduce lambda. This is simple loading in the express application, then service it locally on port 3000 when started via npm run dev.
Next lets open /api/lambda.js
const serverlessExpress = require('@vendia/serverless-express')
const app = require('./app');

exports.handler = serverlessExpress({ app })
Again this is both simple yet powerful. We are using vendia/serverless-expres from https://www.npmjs.com/package/@vendia/serverless-express
This is a wrapper for express applications that takes care of all the extra config we need to run the application in AWS Lambda. So we load the venda package, require the app ( as we did for local development ) and set the export ( handler )
Next open template.yaml
In this file we see the template that will enable this application to run in AWS lambda.
AWSTemplateFormatVersion: '2010-09-09'
Transform: AWS::Serverless-2016-10-31
Description: >

Globals:
  Function:
    Timeout: 600

Resources:
  ExpressApi:
    Type: AWS::Serverless::Api
    Properties:
      StageName: prod
      BinaryMediaTypes: ['*/*']

  ExpressFunction:
    Type: AWS::Serverless::Function
    Properties:
      CodeUri: api/
      Handler: lambda.handler
      Runtime: nodejs14.x
      MemorySize: 512
      Events:
        ExpressFunctionProxy:
          Type: Api
          Properties:
            RestApiId: !Ref ExpressApi
            Path: "/{proxy+}"
            Method: ANY
        ExpressFunctionRoot:
          Type: Api
          Properties:
            RestApiId: !Ref ExpressApi
            Path: "/"
            Method: ANY

Outputs:

  ExpressFunctiondApi:
    Description: "API Gateway endpoint URL for Prod stage for Express function"
    Value: !Sub "https://${ExpressApi}.execute-api.${AWS::Region}.amazonaws.com/prod/"
  ExpressFunction:
    Description: "Express Lambda Function ARN"
    Value: !GetAtt ExpressFunction.Arn
  ExpressFunctionIamRole:
    Description: "Implicit IAM Role created for Express function"
    Value: !GetAtt ExpressFunctionRole.Arn
Take note of the ExpressFunction segment, we can see that the runtime is set to node14, the handler is set to lambda.handler ( the lambda.js file exporting handler ) then notice the 2 events.
These 2 events are to handle incoming requests from API gateway. API Gateway is used to access the incoming http(s) request and then call lambda we need 2 because
- Path: “/” is for the root of the api
- Path: “/{proxy+}” is for anything after the root.
The will both be passed onto the express app which will run in lambda as if it were running locally, on EC2 or on a container.
Lastly we will look at
BinaryMediaTypes: [‘/‘]
This is used when re want to render static assets such as images, html or css. The static assets are in the static folder, for this example there is javascript and css, but you could also store images there for example. A quick disclaimer here, typically we would want the static assets hosted in s3 behind a CDN ( CloudFront ) we will address that in subsequent posts.
Lets now deploy this to AWS Lambda, in your terminal ensure you are in the root of the application folder from git ( not /api one level higher; ie the same level as the template.yaml file ) and run:
sam build && sam deploy --guidedThis will run npm install, and package the app and dependancies from the node modules folder swell as begin the deployment based on the template.yaml the “–guided” is needed the first time we deploy. Enter an appropriate name, Select the region closest you to and say yes to all other questions accepting defaults. At the end of the deployment you will be presented with the URL and your application is now deployed 100% serverlessly into AWS Lambda. Even better you’ll only pay for what you use.
In the next post we will export how to attach a Custom domain!